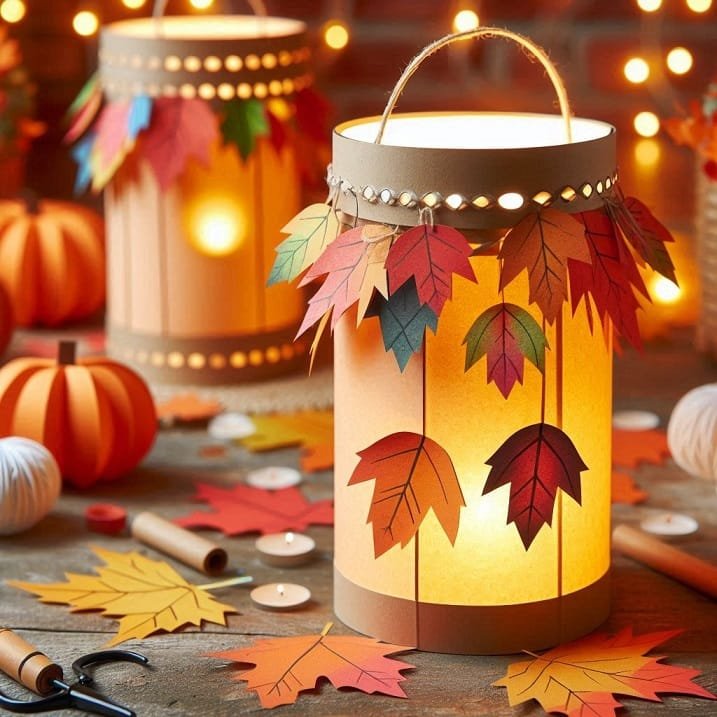
DIY Paper AUTUMN LANTERNS: A Cozy Craft for Kids This Fall
Celebrate the beauty of fall with this easy and creative DIY project—paper autumn lanterns! These simple lanterns, decorated with autumn leaves, pumpkins, and other seasonal motifs, will add a warm glow to your home as the days grow shorter. This project is perfect for kids and can be customized to capture the essence of autumn with different colors and designs.
What You’ll Need
- Construction paper (orange, red, yellow, brown)
- Scissors
- Pencil or marker (for tracing)
- Ruler (optional, for straight lines)
- Clear tape or glue
- LED tea lights (for safe lighting)
- Fall-themed decorations (real or faux leaves, stickers, paper cutouts)
- Hole punch (optional, for added light effect)
- String or ribbon (for hanging)
Step-by-Step Instructions
1. Prepare the Lantern Base
- Cut the Paper: Start by cutting a sheet of construction paper into a rectangle (around 8” x 12” works well for medium-sized lanterns). You can adjust the size depending on how big you want your lantern to be.
- Create the Lantern Shape: Roll the paper into a cylinder shape by bringing the two shorter edges together. Secure them with tape or glue to form the lantern base.
2. Add Seasonal Decorations
- Decorate the Lantern: Before assembling, let your kids decorate the paper with fall-themed designs. They can draw pumpkins, falling leaves, or use real or faux leaves, stickers, or paper cutouts to decorate the lantern.
- Create Cut-Outs: To let more light shine through, use scissors or a hole punch to cut small shapes into the lantern, like leaf or star shapes. This will create a beautiful glowing effect when lit.
3. Assemble the Lantern
- Secure the Shape: Once decorated, tape or glue the sides of the paper to form the cylinder shape of the lantern. Make sure it’s secure so it can stand upright.
- Add a Base (Optional): If you want the lantern to have a bottom, cut a circle from the same construction paper and tape or glue it to the bottom of the cylinder.
4. Insert the Light
- Use LED Tea Lights: Place an LED tea light inside the lantern. These are safe and provide a warm glow without the risk of an open flame.
5. Create a Handle (Optional)
- Add a String or Ribbon: If you want to hang your lanterns, punch two small holes near the top of the lantern and thread a piece of string or ribbon through them. Tie the ends to create a handle.
6. Display Your Lanterns
- Place or Hang Them: Set your lanterns on a table or hang them around your home or porch. The warm glow of the LED lights will create a cozy, autumnal atmosphere.
Tips and Variations for Perfect Autumn Lanterns
- Play with Colors: Use a mix of orange, red, yellow, and brown paper to represent the changing leaves of autumn.
- Nature-Inspired: Collect real autumn leaves and attach them to the lanterns for a natural, rustic look.
- Personalize: Encourage your kids to add their names or messages on the lanterns, making them perfect as fall party decorations or gifts.
Making paper autumn lanterns is a simple and fun fall project that allows kids to explore their creativity while capturing the essence of the season. With just a few basic supplies, you can create beautiful lanterns that bring warmth and light into your home. For more autumn DIY inspiration, check out our DIY Projects section!


